In the sweltering heat of summer, a rechargeable fan can be a lifesaver. But what if you could make one yourself at home? Not only would it be a fun DIY project, but it also allows you to customize the fan to your own needs and preferences. Here’s a comprehensive guide on how to create your own 12v rechargeable fan with a controller, right from the comfort of your home.
Materials List
- 12v DC motor
- Fan blades
- Rechargeable battery (preferably lithium-ion for longer life)
- Systems for managing batteries (BMS) to ensure safe charging and discharging
- Voltage regulator
- Charging socket
- On/off switch
- Wires and connectors
- Soldering iron and solder
- Screwdriver and screws
- Material for the frame: wood, plastic, or metal
- PVC pipe (for the stand)
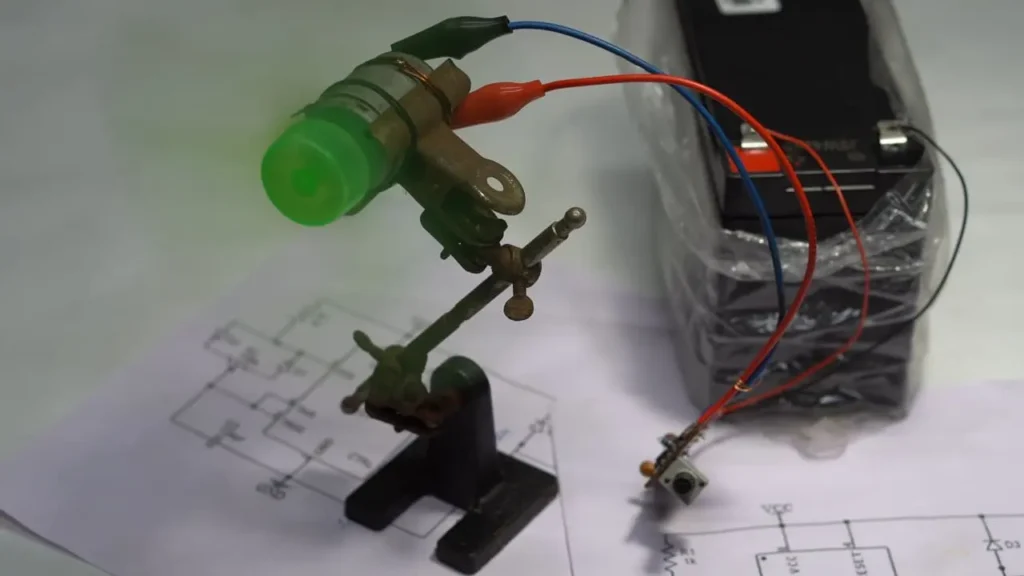
Preparing the Motor and Blades
Begin by attaching the fan blades securely to the DC motor shaft. If you’re repurposing blades from an old fan, make sure they fit the motor properly. Otherwise, you can 3D print or purchase suitable blades.
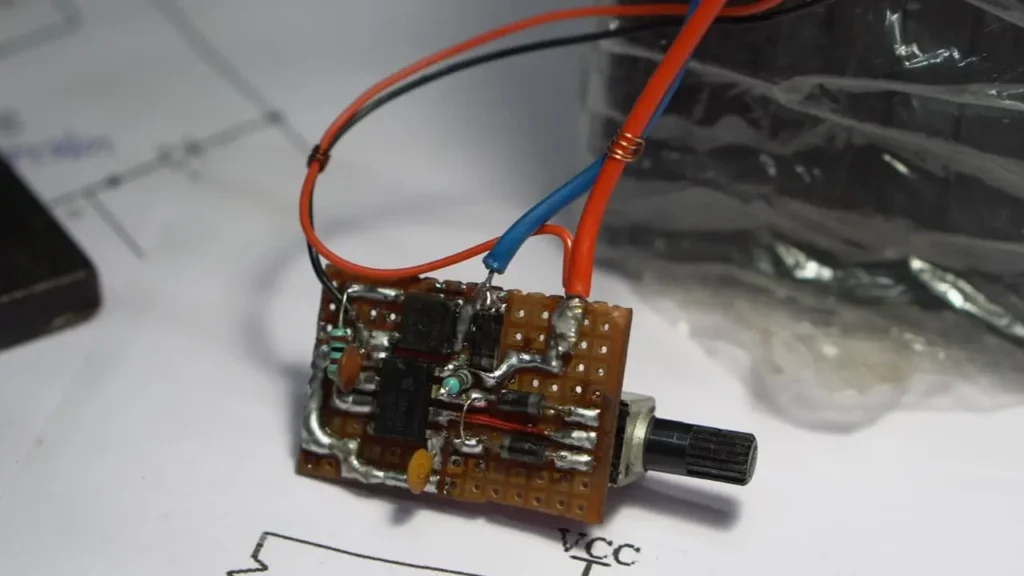
Assembling the Battery and Controller
Connect your rechargeable battery to the BMS. This is crucial for protecting the battery from overcharging and short-circuiting. Then, attach the voltage regulator to manage the power supply to the motor, ensuring a consistent fan speed.
Wiring the Components
Solder the wires to the motor, battery, and switch. Ensure that the connections are strong and insulated to prevent any electrical hazards. The charging socket should be connected to the BMS to allow for easy charging of the battery.
Building the Frame
Create a frame for your fan using the chosen materials. The frame should be sturdy enough to hold the motor and the battery securely. You can use a PVC pipe to make a stand or base for the fan, which can also serve as a handle.
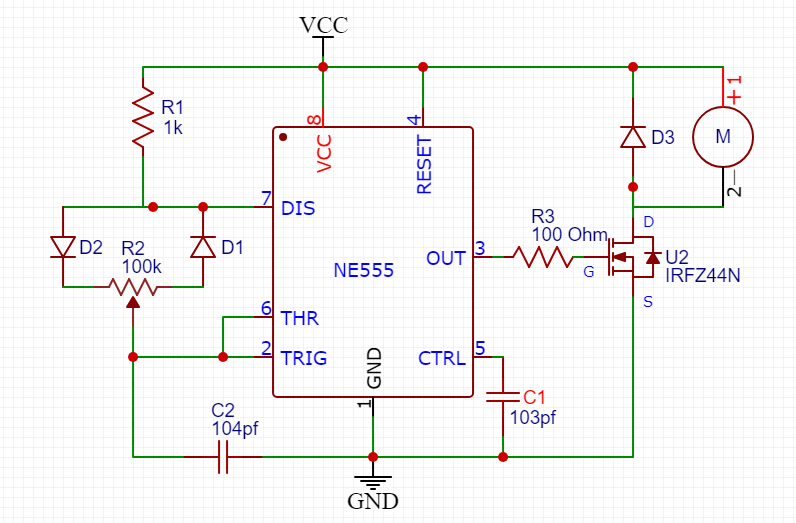
Component List
- IC NE555
- 1k resistor
- DC mOTOR
- 12v battery
- 1ohm resistor
- diode 1n4007 (3ps)
- 100k potentiometer
- 103pf ceramic capacitor
- 104pf ceramic capacitor
- N-Channel MOSFET (IRFZ44N)
Final Assembly
Screws are used to fasten the motor to the frame after mounting it. Attach the battery and controller in a convenient location on the frame where they won’t interfere with the fan’s operation. Make sure all components are securely fastened and that the fan is Balanced.
Testing
Once everything is assembled, it’s time to test your fan. Turn it on using the switch and observe the fan speed and airflow. Adjust the voltage regulator if necessary to achieve the desired fan speed.
How to Make a 12v Rechargeable Fan With Controller Made at Home
- How To Make 3 Phase Bldc Motor Controller Using 555 Ic – With Back Emf
- I Made A Brushless Motor And Controller With Bike Dynamo
- BLDC Motor Controller (बीएलडीसी मोटर नियंत्रक) Circuit Download Free
- 12V-24V DC Motor Controller Using TL494 Circuit Diagram Download Free
- Controlling a Stepper Motor With L293D Driver and Arduino – Free Guide 2024
The Conclusion
Building a 12v rechargeable fan at home is a rewarding project that not only challenges your DIY skills but also results in a practical and customizable appliance. By following these steps and taking the necessary safety precautions, you can enjoy the cool breeze of your very own homemade fan.
Remember, this is just a guide, and there are many ways to approach this project. For more detailed instructions and creative ideas, MrAviPro on YouTube can provide you with additional tips and tricks to enhance your fan-making experience.